
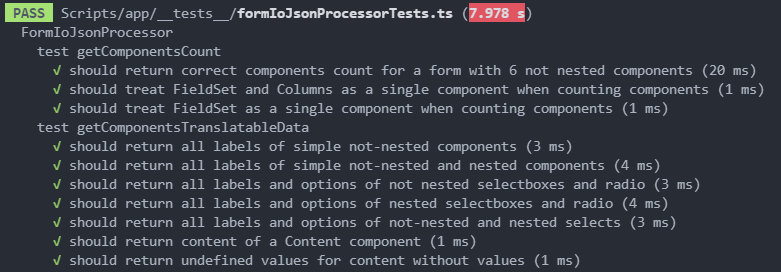
If you are using jest to write JavaScript/TypeScript tests like this one:
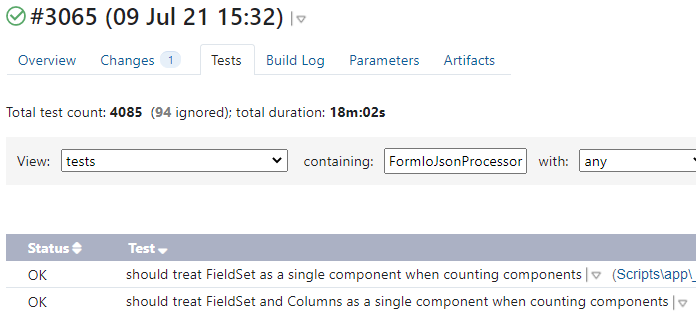
and you’re looking for how to show their results in TeamCity as follows:
Then this article will help you configure that ?
Prerequisites
To run jest tests on TeamCity, you need to use jest as your testing framework of course ? If you use TypeScript – which I definitely recommend – ts-jest package will also be useful.
Having these packages installed, your basic jest.config.js file should look similar to this:
You should also have a test script defined in scripts section of your package.json file:
With this setup, you are able to execute your tests with npm test command and see the results in the console:
Such tests results are however not recognized in any way by TeamCity build server. Let’s see how to configure that.
Installing TeamCity reporter
In order to see the tests results in TeamCity, we need the npm test command to produce a different output when run on TC server. This output must be compatible with TeamCity’s service messages.
Fortunately, you don’t need to implement it by yourself ?
First, install jest-teamcity npm package to your project. Next, add jest-teamcity to reporters configuration option in your jest.config.js file:
Adding TeamCity build step
Next, login to your TeamCity server. You need to know the location of npm.cmd file on your TeamCity server. It should be in NodeJS installation catalog. In our case, the path to the file is C:\Dev\nodejs\npm.cmd.
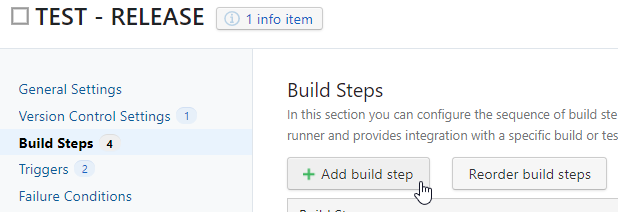
Now, go to TeamCity web administration interface and create a new build configuration or edit a current one. Then, add a new build step:
Configure the new step as follows:
- Runner type: Command line
- Step name: Jest JS tests
- Execute step: If all previous steps finished successfully (or anything else you prefer)
- Working directory: name of the catalog in your web app where you normally run
npm test - Run: Custom script
- Custom script: „your_path_to_nodejs\npm.cmd“ run test, for example: „C:\Dev\nodejs\npm.cmd“ run test
- Format stderr output as: error
If everything is configured correctly, during the next build you should see jest tests output recognized and nicely reported by TeamCity:

If that’s not the case, make sure that TEAMCITY_VERSION environment variable is set on your TeamCity machine. That’s how jest-teamcity reporter recognizes when to output standard jest output and when to use TeamCity’s service messages format.
Debugging jest tests on TeamCity locally
If you run npm test locally, you will see that the output is still normal, not the TeamCity format. That’s correct, because as we said before, the TEAMCITY_VERSION environment variable must exist in order to see TeamCity-formatted output. Normally we don’t want to see TeamCity-formatted tests output locally, of course ?
It means that if you want to debug this configuration locally and actually see the TC tests output on your dev machine, you need to define such environment variable locally.
In order to do that in Windows, go to Edit the system environment variables, click on Evironment Variables... and add a new one in System variables section. Call this variable TEAMCITY_VERSION and give it some value, for example 2021.1:
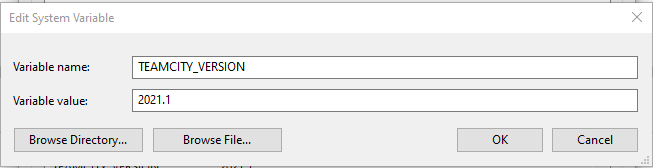
If you’re on another operating system, add the environment variable according to your system’s requirements.
Next, restart Visual Studio Code or the console tool you are using and execute npm test again. Now you should see the tests results output in TeamCity format:

Jest tests in TeamCity – summary
I hope you found this piece of advice useful. At Yumasoft, we value tests a lot, both backend and frontend ones. However, the tests which are not run automatically are worth nothing. That’s why we always have all of our tests run automatically as part of our CI process (TeamCity in the sample project’s case).